In this week’s blog, we will show you how to make the two ends of a Cat5 Ethernet cable and provide valuable tips for your home network setup. A home network setup is relatively easy. It allows you to place a jack to receive internet service in areas that may not be serviced well by a wireless connection from either speed or accessibility issues.
DIY Home Network Setup Video
Running Ethernet Through Your Home
The first step is to analyze your home and determine where the jack and router will be, how you will get it there, and how long the cable will need to run. The needs vary from house to house so there is no one answer for a home network setup. -SOME ADVICE- When you are running the wire through walls, remember these three things:
- Run wires through center of studs so you can screw drywall into the studs
- Keep the Cat5 or Cat6 cable at least a few feet from the electrical line to minimize interference
- If you must cross electrical line, do so at a 90 degree angle to minimize interference
How to Create Home Network “Plug” Ends
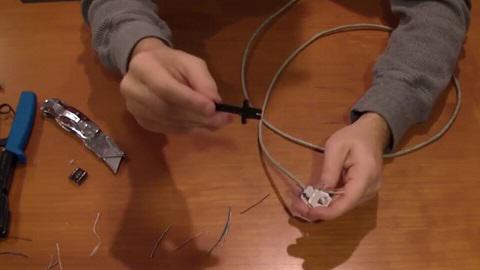
To wire your home network you will need two ends, a plug and a jack. The plug will connect to your router. The jack will be exposed through the wall to connect your internet device. To create the plug end, you need Cat5 or Cat6 Ethernet cable, RJ45 connector ends (pictured to the right), a sharp utility knife, scissors, a network end crimping tool, and preferably a cable connection tester to check for mistakes before you install the cable. To create the plug end of your home network cable, follow these steps:

RJ45 connector
- Remove about 2 inches of the rubber sheathing from the cable
- Remove fabric piece
- Untwist the 4 wire pairs (Orange-white/orange, blue-white/blue, green-white/green, brown-white/brown)
- Order the pairs from Left-to-Right: White/orange, Orange, White/Green, Blue, White/Blue, Green, White/Brown, Brown (Image to right)
- Trim in straight line to about 3/4″ to 1″
- Gently slide the connector end with the clip facing down. DO NOT FORCE!
- Ensure ends are touching connectors and order is correct
- Use Crimping tool to secure connector end in place
If you do this correctly, all ends should line up with the conductors in the plug and the wires should be ordered in the colors described above.
How to Create Home Network “Jack” Ends
The jack end of your Home Network Ethernet cable will be the end that is exposed through the wall. You will use this jack to plug in your device via an Ethernet cable to gain access to your internet connection. This step is, IMO, simpler than the Ethernet plug end. It’s also nice because if you mess up the wiring, you can redo it without starting from scratch. The steps are:
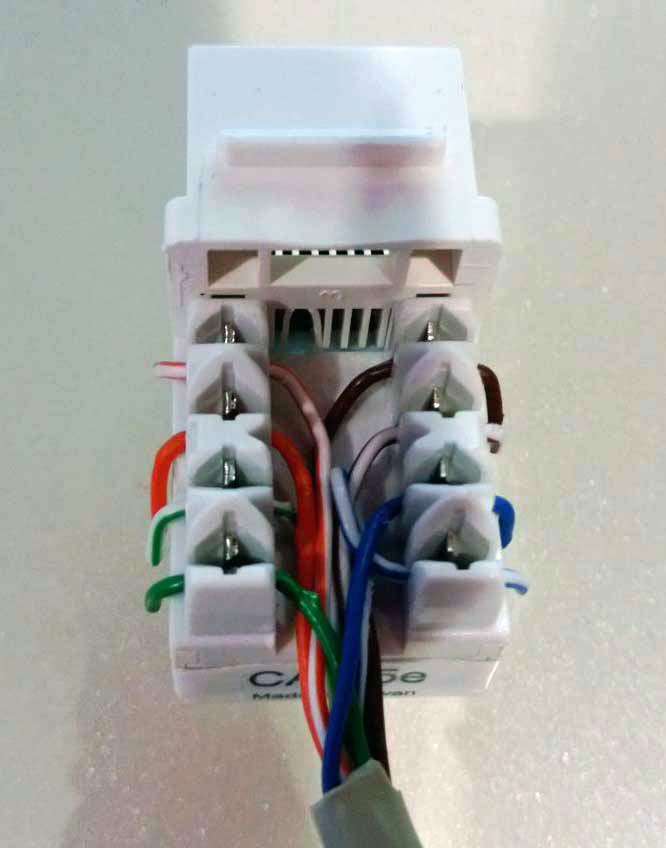
Ethernet Cable Jack (top view)
- Remove about 2 inches of the rubber sheathing from the cable
- Remove fabric piece
- Untwist the 4 wire pairs (Orange-white/orange, blue-white/blue, green-white/green, brown-white/brown)
- Place wires in corresponding slots following the B-Convention color pattern shown on the jack.
- Use tool or screwdriver to push wires down all the way
- Place plastic cap over wires
- Wrap exposed wire and cap in electrical tape
- Insert into faceplate and attach faceplate to wall
You should now have a network connection allowing you to access the internet through a hardline anywhere in your home! If you wish to try this on your own, best of luck! If you have any questions, leave a comment below and we will answer it promptly. If this task is a bit challenging for you, give us a call at 513-322-2914 and we will be glad to help!
Thanks for reading and as always, we’d love to hear stories, questions or comments in the section below.


Wow! Excellent Post. I really found this so much informatics. It is what I was searching for I would like to suggest you that please keep sharing Such type of information. Thank you so much.
I just stumbled across this post and feel I should share some of my thoughts:
– If you have to use a utility knife to remove the outer sheathing of the cable, be very careful not to nick any of the conductors. It may cause performance issues (crosstalk) or even cause the conductor to break off. Using a cable sheath stripper is preferable. (I realize this is aimed at the home installer)
– Do not untwist the pairs all the way. Maintain the twist of each pair as close to the point of termination to avoid crosstalk. It makes the world of difference in your network speed.
–