Frequently, ProMaster’s Home Repair Heroes go far beyond Cincinnati home repair and handyman services – in this case, it was building a custom shed.
Professional Craftsman Nathan Porter and Craftsman Bryan Bell were recently tasked with the job to stretch their custom carpentry skills to the limit.
It was such an involved project that simple before and after pictures wouldn’t do it justice. So we thought we’d show you how Nathan and Bryan built it, step by step!
STEP 1: Location, Location, Location
One of the biggest challenges of custom carpentry is that often, you don’t have the luxury of a framework or a directive.
Bryan and Nathan experienced that as they looked for a location for this custom shed.
Nathan: “One of the big things was the existing fence. We were trying to figure out how to orient this in the yard, because the fence isn’t at a 90 degree angle.”
Bryan: “We couldn’t measure off the fence, so we had to visually orient it as best we could.”
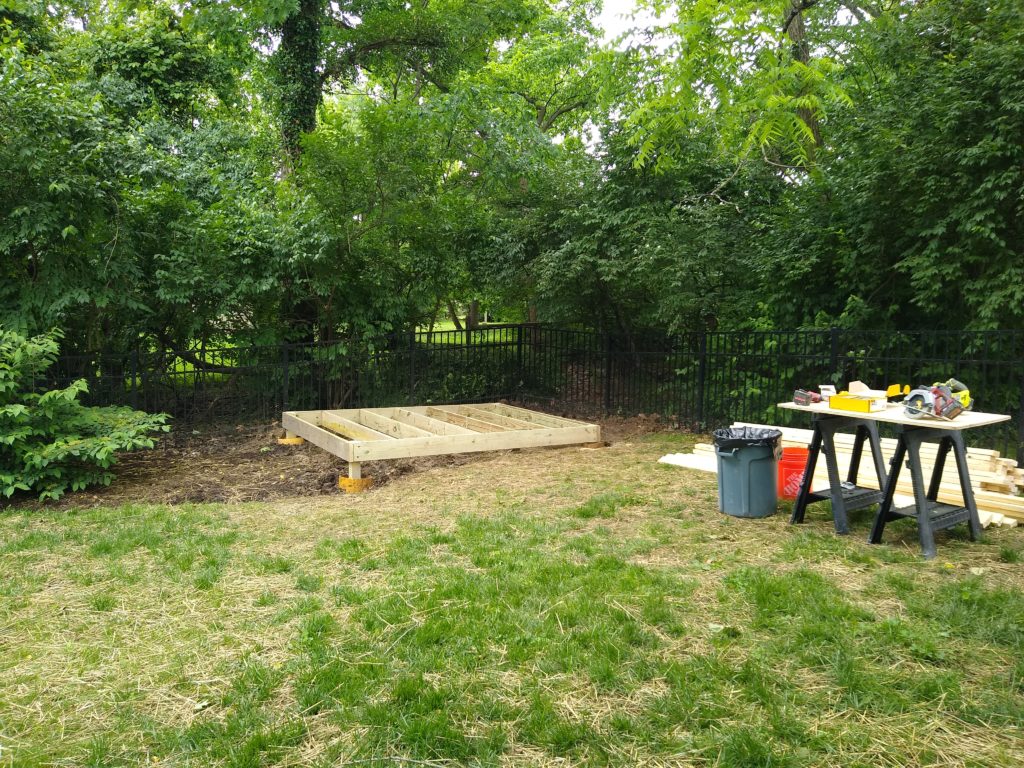
STEP 2: Leveling It Out
After removing the tree and getting the ground ready, Bryan and Nathan faced their next obstacle. They needed the shed to remain level on unlevel ground.
Nathan: “We dug the footers for the concrete to set the posts. You can see they are all different heights there so we had to make sure to level it all out.”
“Then we had to insert the joist hangers and evenly space them to make sure the weight is secure.”
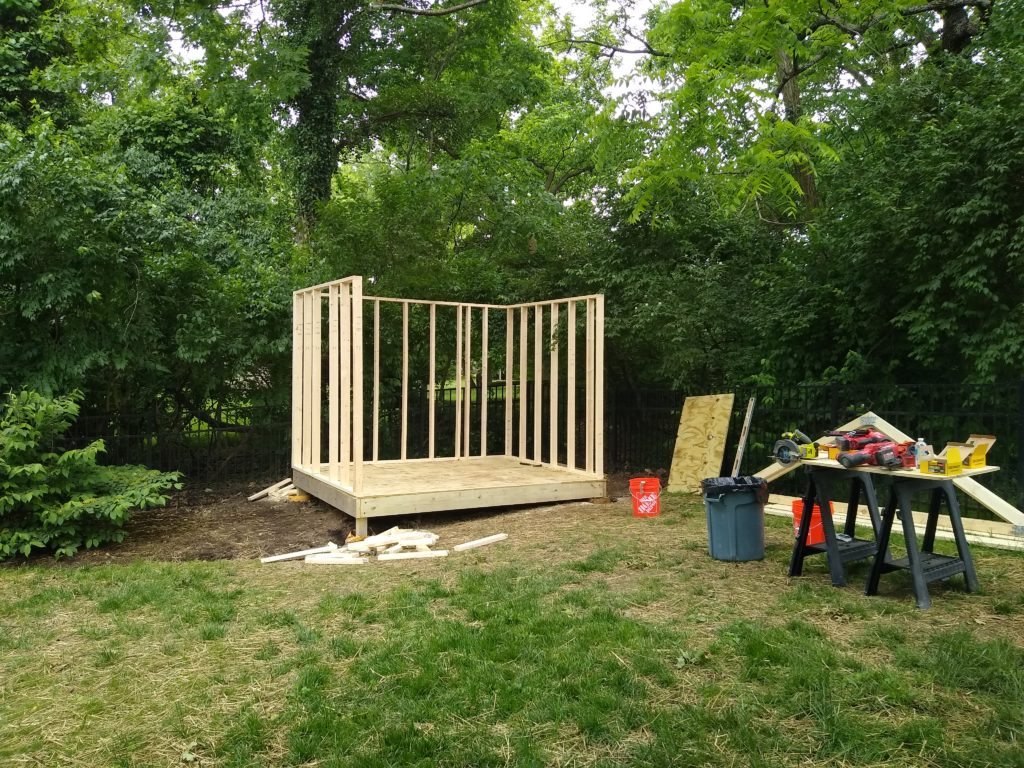
STEP 3: Building the Custom Shed Walls
Another custom carpentry challenge then reared its head – the need for trial and error. Nathan and Bryan began to erect the shed wall framework but soon realized they needed a new plan.
Nathan: “This was interesting. We initially built the frames and decided that since they are eight-foot studs, we’ll just use that. But the wall was way too tall. So the first wall we put up we actually took back down.”
Those walls needed to support the trusses for the roof of the shed, which went up next. But before the trusses came into the picture, Nathan and Bryan got creative with woodworking to build them to specifications.
Bryan: ”What the pictures don’t show is all the trusses on the right side. We built all those trusses before we put the walls up. We had a custom jig that Nathan created to lay them down to cut them at right angles, get them securely fastened. So we did all the trusses, set them aside, and then we built the walls because it would be easier to put the trusses up that way.”
“There were no plans, no blueprints. There was a picture of a finished shed. So we just kind of came up with our own design. Everything about this was custom.”
BRYAN BELL, CRAFTSMAN
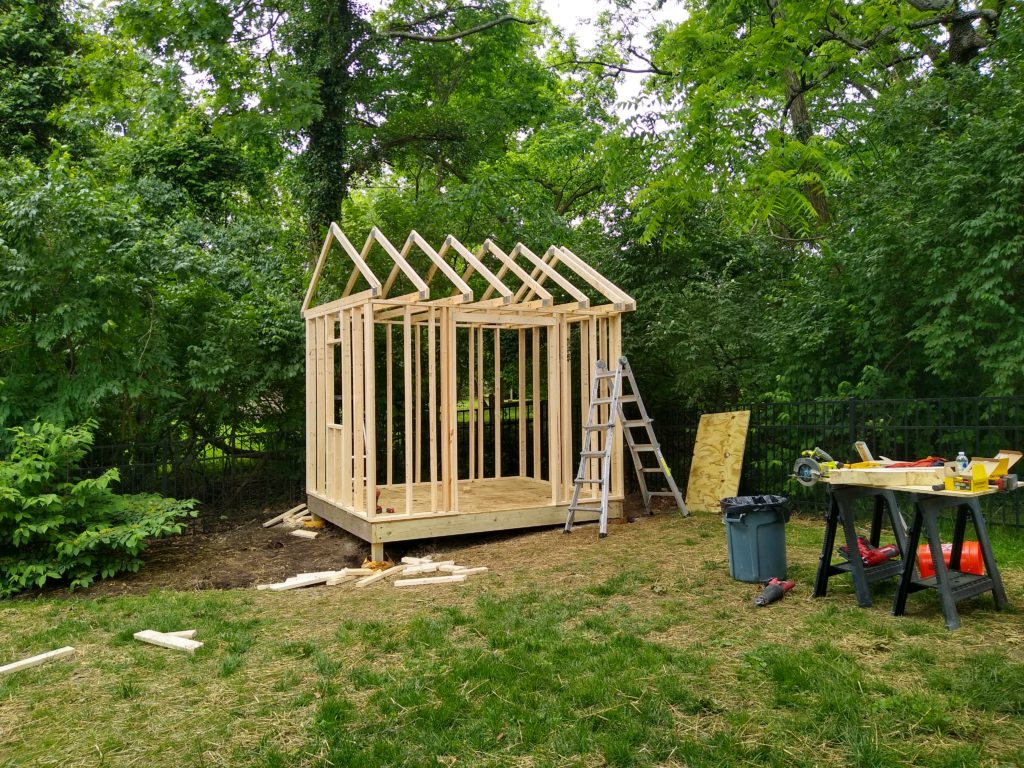
STEP 4: Up Go the Trusses
Those trusses made their appearance next, as did the majority of the remainder of the carpentry framing needed for the shed.
Just like building a home, the guys made sure to leave room for the finishing touches.
Nathan: “As for considerations on putting the walls up, we knew it had to have a window on the front so we left space for that. Then we had to basically manufacture our own double door and decide exactly how wide we wanted that and leave space for it.”
More on that custom manufactured double door later!
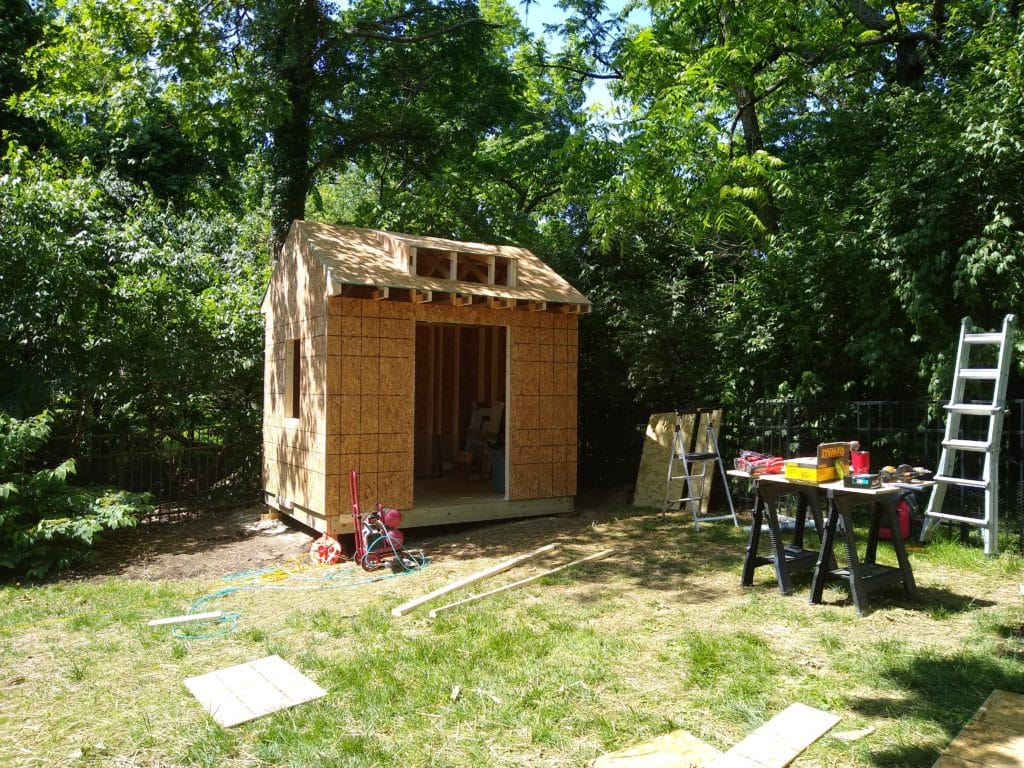
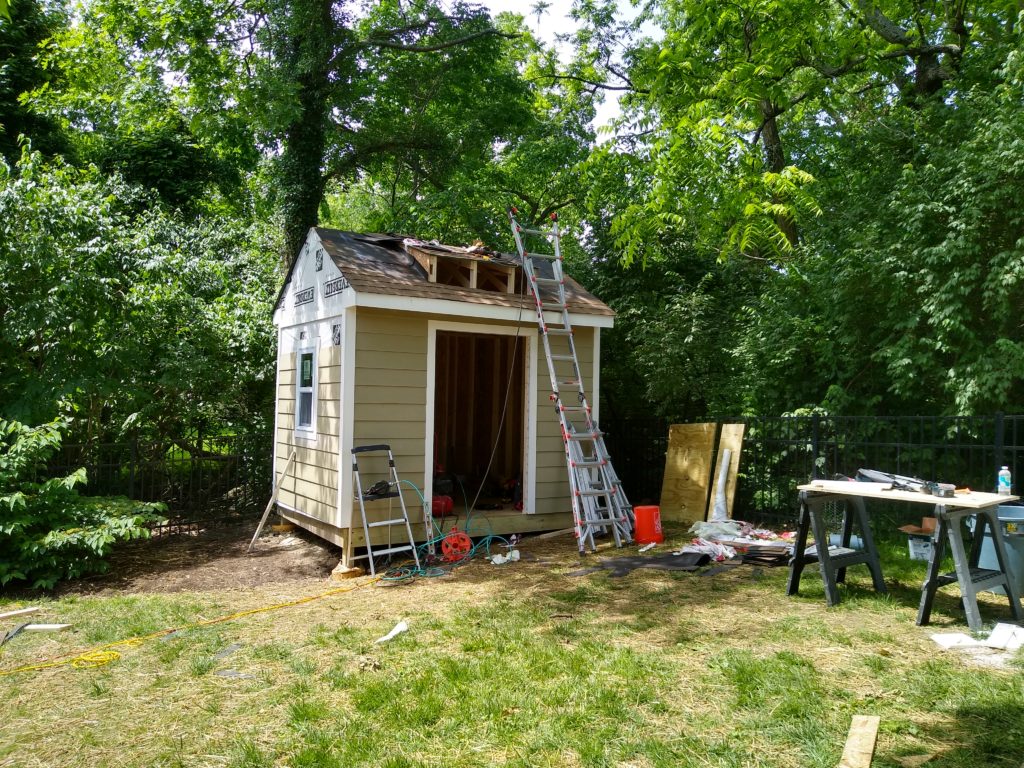
STEP 5: Hey, It Looks Like a Custom Shed Now!
All of that hard work on carpentry framing held up beautifully as the shed began to come together for the final touches.
The guys added more wood framing within the trusses to leave room for the small window in the front of the shed.
Bryan: “It’s a bit hard to see, but Nathan built all the framing for the dormer above the door there, so he had to lift up that part of the roof and get the structural framing in there.”
Nathan: “Again, for those angles on the dormer, we were basically trying to replicate the photo we were given as closely as possible.”
STEP 6: Siding Attachment and Trim Installation
Nathan and Bryan brought in some help from craftsmen Mike McVey and Roscoe Walker to help finish the aesthetic details of the shed. Custom carpentry projects like this often require an extra set of hands!
On the list of things to do: siding attachment, trim installation, roof repair, and window installation.
Bryan: “We put all the trim up and then fit the siding between the trim. At that point, Roscoe was on the roof getting all the rosin paper and shingles up there while Mike and I worked on the siding.”
“The whole idea was matching their home. They’ve got multiple dormers and similar siding on their house, and they even have some of those cedar shakes you’ll see on the side of the shed there.”
Let’s see those cedar shakes!
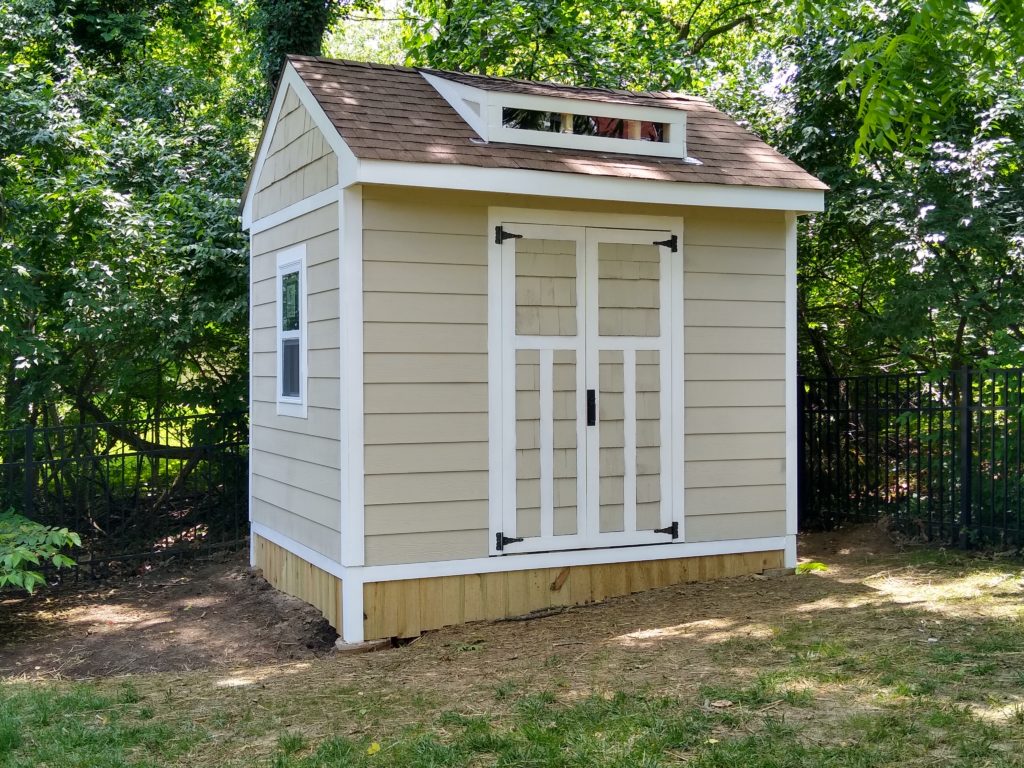
STEP 7: It’s a Complete Custom Shed!
Plenty remained to create the finished product you see here!
Among that was installing cedar shakes above the windows on the sides of the shed. Exterior painting of the shakes and the siding to fully match followed before the door installation commenced.
And it wasn’t an easy task.
Nathan: “We had to custom-build the door and the trim around the bottom. They specifically wanted the wood at the bottom so they could mulch around the shed. Fitting that latch in there was challenging. We accidentally locked it close at one point.”
Bryan: “Yeah, we literally had to take the hinges off because the door latched the long way.”
Nathan and Bryan both laughed as they recounted the week-long journey to this custom built shed. They’re proud of their work – with good reason.
Bryan: “If you were to add insulation and some wiring, it was built like you’d build a house. That’s exactly what it is. A little tiny house.”
Looking to hail a ProMaster Home Repair and Handyman craftsman to complete your next Cincinnati custom carpentry or other Cincinnati home repair job?
CLICK HERE to visit our contact page or CLICK HERE to access our online scheduler. You can also call our office at 513-322-2914 to schedule.
Find more about ProMaster Home Repair and our craftsmen HERE. View our list of services, from custom carpentry to door framing, trim installation, siding repair, and much more HERE.
For more videos from ProMaster, visit us on YouTube and follow us on Facebook.


This was just what I was looking for. I own a business and we are in need of a shed for small engine repair. Thanks for the post
Jason, we’re glad to know this helped out! Thanks for taking the time to reply and let us know!