Drywall Repair
Drywall repair is a straightforward process that just about any homeowner can learn to do.
Given that homes today are built with lumber inferior to that of generations past, movement of drywall from warping and shrinking in the home’s framing causes a variety of drywall-related problems. Therefore, many homeowners will need to repair corners, cracks, screw pops, tape seams, and other drywall imperfections that accrue over time. In addition, damage from water intrusion, household accidents and normal wear and tear necessitate a periodic drywall repair to keep the walls looking good, especially before they are painted.
Thankfully, drywall repair tools and materials are inexpensive and easy to find. The skills and techniques for performing drywall repair, however, are slightly more complex. Not every person will be able to perform a drywall repair as well as a ProMaster Master Craftsman, but many homeowners can perform satisfactory drywall repairs on their own, with a little practice.
Call (513) 322-2914 for Drywall Repair
If you decide to tackle a drywall repair yourself, here is my quick “how to guide” that will satisfy most projects around your home.
How to Repair Drywall in 9 Simple Steps
For the sake of discussion, I’m going to assume that you’ve never finished or repaired drywall before. In addition, let’s pretend you aren’t like me in that you’ll use any home project as an excuse to acquire more tools, whether absolutely necessary or not. (Don’t tell my wife this!)
So the purpose of the following guide is to help the beginner do-it-yourselfer accomplish his/her first drywall repair, with minimal steps, tools and materials. Since most of you reading this post live in Cincinnati, Ohio, it highly probable that your home’s walls are made of conventional drywall, finished with a smooth texture.
If your home’s walls are made of plaster, I wouldn’t recommend attempting a repair yourself. With plaster, it is best to leave it to a qualified pro like a ProMaster Master Craftsman.
And that advice goes for large drywall holes, too. I can’t tell you the number of calls we get from folks that are completely dissatisfied with their attempt at patching a drywall hole or severe crack. So for your first drywall repair, it’s best to start small with simple cracks, dents, nail pops, nail holes, nicks and loose seams.
Drywall Repair Tools and Materials
Go to your local home improvement store and buy:
- (1) 4” Drywall Knife
- (1) 12” Stainless Steel Mud Pan
- (1-qt) All-Purpose Joint Compound
- (1) Drywall Sanding Sponge
- (1-qt) Latex-Based Drywall Primer
- (1) 2” Angle-Tipped Paint Brush
1. Depending on the amount of drywall repairs required, remove an appropriate amount of joint compound (or “mud,” as it is commonly referred to) from the plastic tub using your 4” drywall knife and scrape it off into your 12” mud pan. The idea here is to keep the joint compound fresh so that is doesn’t dry out—so only take as much mud out as you can use within 10 minutes. Otherwise, “chunks” of drywall mud develop, making your drywall repair much more difficult.
2. Briefly work the drywall mud back and forth in your pan a few times–like you would knead bread dough. This removes air from the mud to help reduce bubbles when you place it on the wall.
3. Apply a thin coat of drywall mud to the crack or dent. Use the knife to scrape the mud flush with the surrounding surface of the drywall. It is better to apply 2 or 3 thin coats of mud (allowing each coat to dry in between applications) versus one thick coat. One of the more common mistakes I see with drywall repair is mud that is applied too thick. This rarely results in a good surface and makes for additional time and mess during the sanding phase.
4. Allow the mud to dry. Dry time is highly influenced by type and brand of compound, thickness and amount of mud application, as well as ambient temperature and humidity of the room. If you want to accelerate dry time, grab a hair dryer to dry the area (as seen in this picture of my craftsman Drew).
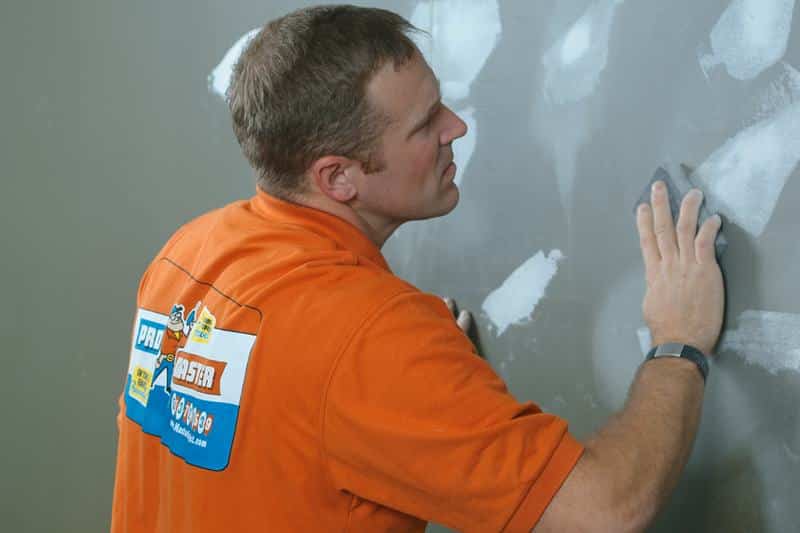
5. Once the drywall mud is completely dry, place a drop cloth below the area of drywall repair, as you’re going to make a mess next! Use your sanding sponge to sand the area flush with the remaining wall. Use lighter pressure as you finish to avoid gouging or scratching up your work. Some people like to have a buddy hold a shop vacuum up to the area to suck up all the drywall dust while they work. If you decide to do this make sure you have a drywall dust or HEPA filter installed—otherwise you’ll just end up blowing the dust throughout the room.
6. Take a damp paper towel or cloth to wipe down the drywall repair to remove any remaining dust. You can also use a wet cloth or sponge to “wet sand” the area to get an extra smooth effect, if desired.
7. Using your small paintbrush, apply a light coat of primer to the drywall repair. This will seal the joint compound, hide the repaired area, and prepare it to accept paint.

Painting a Room
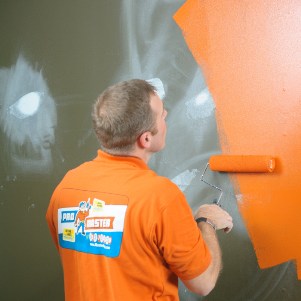
8. When painting the drywall repair, I recommend painting an entire section of the wall, if possible. Although you may have left over paint from when the wall was originally painted, or purchased new paint with same formula as the original, it is unlikely to match. Walls age and collect dirt as time passes, altering their appearance and color. Hence, if you can paint a whole section of the wall, up to a corner or seam, the difference of “new” versus “old” paint is less visible.
9.This is by far the best part of the job: stand back, admire your work, and brag to all of your friends and family how handy you are!
For Drywall Repair Call (513) 322-2914
Let ProMaster Do My Drywall Repair
ProMaster Home Repair & Handyman is a great choice for those who don’t have the time or inclination to perform their own drywall repairs. From simple crack repairs in walls and ceilings to complete water damage restoration services, ProMaster of Cincinnati has a skilled team of professionals who understand that attention to detail, artistry and precise craftsmanship are the keys to success in any drywall repair project.
Our Master Craftsmen are professionals who have honed their drywall repair skills by experience and a quest for perfection. Keep in mind that these craftsmen aren’t just drywall repair experts; they are skilled at other home repair tasks like carpentry, concrete & masonry, drywall & paint, electrical, flooring & tile, plumbing and roofing. Our multi-skilled craftsmen represent a distinct advantage over other drywall repair contractors due to their ability to perform numerous tasks associated with a drywall project.
Click here to watch a video from the President of ProMaster, introducing the company.


Would love to hear your thoughts/feedback on this post!
Don,
You blog post is cutoff here….
"So the purpose of the following guide is to help the beginner do-it-yourselfer accomplish his/her first drywall repair, with minimal steps, tools and materials. Since most of you reading this post live in "
Thanks… looking forward to reading the rest of this post.
Dave
Don, Looking forward to chatting & thanks for calling as I've also admired your blogging but never thought to pick up the phone & call you … duh. I'm also not seeing your video (have already checked it out & I like it) and I'm using Firefox, not IE.
As for this article, … and my comments are more from my writing style / perspective. You focus on the "how to" steps flow nicely, and funny but I jumped right there and skipped over the intro (just read that we shouldn't be writing long intros … so I have to unlearn that).
My sense is a little out of balance:
o Would develop more, which types of repairs to try yourself … or not
o Would address the planning up front, i.e. how much painting
o Didn't see explanation of multiple coats & feathering out
Funny but I was hoping to learn more about when to use the "ball of newspaper" approach to a hole versus mesh tape repair kits? Funny how everyone has their own approach.
When we talk, maybe we can come up with approach to give each other feedback like this … maybe monthly call?
Tina-
Great to hear from you! Thank you so much for the thoughts… I want to do everything I can to make these posts more useful and informative for folks… so I appreciate the input.
And, by the way, I think you are doing a great job with your web site http://hometipsandtools.com/ … I think the association you've put together is fantastic.
By the way, do you have the latest flash plugin for Firefox? The video is streamed from YouTube, so without the flash plugin, it won't play.
Look forward to speaking with you more! You're welcome to drop by our blog any time!
Don
Hi There,
Good post.. I have a question for you.. In my livingroom i have i have noticed on one section of the wall the drywall screws are popping out? Any reason why that would happen? And what do i need to do to fix it?
Thanks and I love your blog!
That is an outstanding question, as many people have this problem in their homes. The problem you are speaking of is commonly referred to as "drywall pops." The mud that was placed over the screw or nail head has either come loose or has been driven out. Most often this is due to movement in the wall. These pops are easily repaired and can even be done yourself!
Hay Don,
not sure what to do, I had a handyman come in to remove the wallpaper from all my walls. He was to lazy and gouged the heck out of my walls as well as leaving the glue behind. The walls look terrible. bad plastering did not help the case. So do I sand everything down and apply thin layers of plaster? have you come look? or light a match to the whole house
Damage to drywall upon removing wallpaper is common. Typically one must skim coat the walls, prime and repaint.
Great writing! I want to see a follow up on this topic 🙂
This really helped me with my drywall http://howtofixstuff.blogspot.com/2012/01/how-to-…
Bright idea for the home owner’s to make a repair on their own. Thank you for sharing the tips and it was helpful.
Great article for those who doesn’t know how to repair walls or for those who are a beginner in drywall repair.
Just like anything else, it gets much easier once you’ve done it a couple of times. Just follow the directions laid out and you’ll be just fine!
I admire the valuable information you offer in your articles very nice.
exterior house painting Toronto